Accidentally Deleted Important Files? Here’s What to Do First
Deleted something important? Learn the first steps to take, what not to do, and how Stellar Data Recovery can help you scan, preview, and recover files with 1GB free recovery.
That tiny moment after deleting the wrong file is horrible. One second you are cleaning up a desktop, formatting an old USB stick, emptying the Recycle Bin, or tidying a camera card. The next, your stomach drops because the file you actually needed is gone. It might be a work document, a client folder, photos from a trip, video clips for a project, invoices, university work, or a spreadsheet you promised yourself you had backed up. Most people panic, click around, download random tools, or carry on using the same drive while hoping the file will magically come back.
The good news is that accidental deletion is often not the end of the story. In many cases, deleted files can still be recovered because the operating system does not immediately wipe the actual data. It usually marks the space as available for new data. That means there is a window of opportunity, but it is not unlimited. The more you use the drive, the greater the chance that Windows, an app, a browser cache, or a system update writes over the same space.
This guide explains what to do first, what to avoid, and how to use free data recovery software sensibly before the situation gets worse. It also includes a practical test using Stellar Data Recovery Free Edition, including screenshots from a real recovery workflow, so you can see what the process actually looks like rather than reading a vague list of features.
First, Stop Using the Device Where the File Was Deleted
The single most important rule is simple: stop using the affected drive. If the deleted file was on your main Windows drive, avoid installing new software, copying downloads, saving documents, or running large updates on that same drive. If the file was on a USB stick, SD card, external hard drive, or secondary partition, unplug it or stop writing to it straight away.
This matters because deleted files are often recoverable only until their old storage space is overwritten. Think of it like a parking space. The car has left, but the painted lines are still there. Once another car parks there, the old space is no longer available. File recovery works in a similar way. If Windows has not reused the space, recovery software may still be able to find and rebuild the file. If that space has been overwritten, even the best recovery tool has far less to work with.
A common mistake is downloading a recovery program onto the same drive you are trying to recover from. That can accidentally overwrite the very files you want back. Where possible, download and install the recovery software on a different drive, then recover the files to another location as well. Never recover files back to the same location you are scanning unless there is no other option.
Check the Obvious Places Before Running a Scan
Before you move into recovery mode, check the simple stuff. It sounds painfully basic, but plenty of “lost” files are hiding in places that take seconds to check. Start with the Recycle Bin. If the file is there, right-click it and restore it. Then check OneDrive, Google Drive, Dropbox, iCloud Drive, or any other sync tool you use. These platforms often have deleted files, version history, or recycle-bin-style recovery areas.
Next, use Windows Search, including partial file names. If you cannot remember the exact name, search by file extension, such as .docx, .xlsx, .jpg, .mp4, or .pdf. Sort by date modified and check whether the file was moved rather than deleted. Also look in Downloads, Desktop, Documents, Pictures, and any project folder where you may have dragged it by accident.
If the file came from a camera, phone, drone, dashcam, or voice recorder, check whether the original device still has a copy. Many people delete from the computer and forget the media card still contains the original file. Likewise, email attachments are often recoverable by searching your sent and received mail. These checks do not replace proper recovery software, but they can save you time and reduce the risk of writing more data to the affected drive.
When Software Recovery Makes Sense
Recovery software is worth trying when a file has been deleted from the Recycle Bin, a folder has vanished, a USB drive has been formatted, an external drive is readable but missing files, or a memory card has been cleared by mistake. It can also help when a drive is still visible in Windows but the file structure is messy or incomplete. The key point is that the device must still be physically accessible. If a hard drive is clicking, failing to spin, not detected at all, or has suffered liquid or impact damage, professional data recovery may be a safer route.
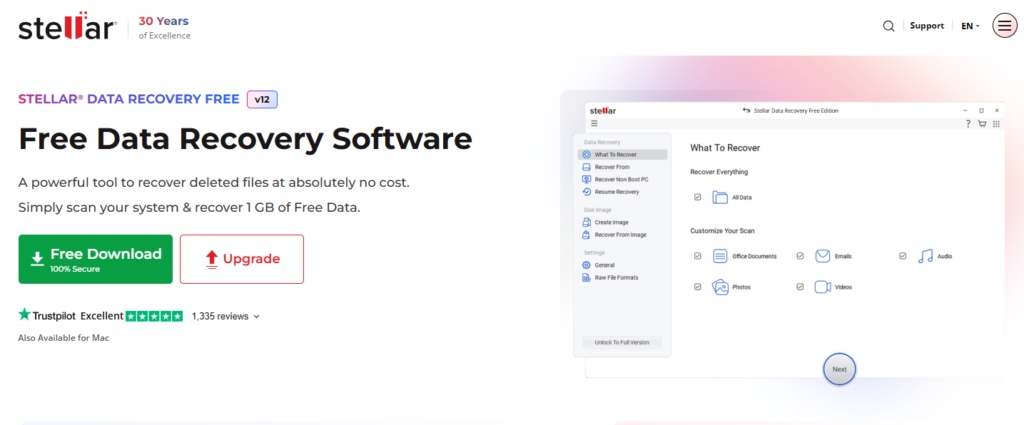
For everyday accidental deletion, a DIY tool is usually the fastest first attempt. It lets you scan the affected drive, preview what can be recovered, and save recoverable files somewhere safe. Stellar Data Recovery is built around that scan, preview, and recover flow, and the Free Edition is particularly useful because it lets you recover up to 1GB of data for free. That is enough for a lot of common emergencies: a batch of documents, several PDFs, a folder of photos, or small project files.
The free limit is important because it means you can test the software on a real problem before deciding whether you need anything more advanced. If your missing data is under that 1GB allowance, you may not need to upgrade at all. If you are dealing with a large video archive, a formatted drive, or multiple folders of business data, the free version still lets you scan and preview before making the next decision.
For anyone who needs a quick starting point, the free data recovery option is the most sensible first stop because it focuses on the core recovery task without making you commit before you know what is recoverable. You can also visit Stellar for the wider range of data recovery, repair, and file utility products.
What Makes Stellar Data Recovery Useful in a Real File-Loss Situation?
The most useful recovery tools are not the ones with the longest feature list. They are the ones that make the first few minutes less confusing. Stellar Data Recovery opens with plain choices: what you want to recover, where you want to scan, and where you want to save the recovered data. That matters because someone who has just deleted an important file is not usually in the mood for technical menus and cryptic disk language.
The Free Edition can recover documents, photos, videos, audio files, folders, and other common file types. It supports recovery from internal drives, external storage, USB drives, SD cards, and other connected media. In a test situation, the software was straightforward enough to use without needing a manual. The interface walks through the process in stages, and the preview screen helps confirm whether the deleted folder or file is actually visible before saving anything.
The 1GB free recovery allowance is the standout point. A lot of “free” recovery tools let you scan but then stop at the recovery stage. Stellar’s free version gives you a practical recovery allowance, which makes it genuinely useful for smaller accidents. A deleted Word document folder, a handful of spreadsheets, scanned paperwork, or a set of JPEGs can often fit well inside that 1GB limit.
Quick Checklist: What to Do in the First 10 Minutes
| Do this | Why it matters |
| Stop using the affected drive | Prevents new data from overwriting the deleted files. |
| Check Recycle Bin and cloud backups | The fastest recovery may be built into Windows or your sync service. |
| Do not reinstall apps or save downloads to that drive | New files can occupy the space where deleted files still exist. |
| Install recovery software to another drive if possible | Keeps the recovery attempt from damaging the recovery chance. |
| Recover files to a different destination | Avoids overwriting other files found during the scan. |
| Try Deep Scan if the first scan misses the file | A deeper scan can find files that a quick scan does not list. |
Hands-On Use Case: Recovering a Deleted Test Folder with Stellar Data Recovery
To make this guide more useful, I tested the typical “oops, I deleted the wrong folder” scenario. The test was deliberately simple: a folder was placed on a data drive, removed, and then the drive was scanned using Stellar Data Recovery Free Edition. The aim was not to create a lab-perfect benchmark. It was to mirror what a normal user might do after deleting the wrong folder and realising they need it back.
The test also shows why the basic recovery rules matter. The deleted folder was not restored back to the same place. Instead, the scan was run, the recoverable item was selected, and the recovered data was saved to a separate recovery folder. That is the safer workflow because it avoids writing new data into the exact area being examined.
Step 1: Confirm the file or folder has actually gone
The first screenshots show the working drive before and after the test folder was removed. This is the point where most people panic. Before doing anything else, stop using that drive and avoid saving anything new to it.
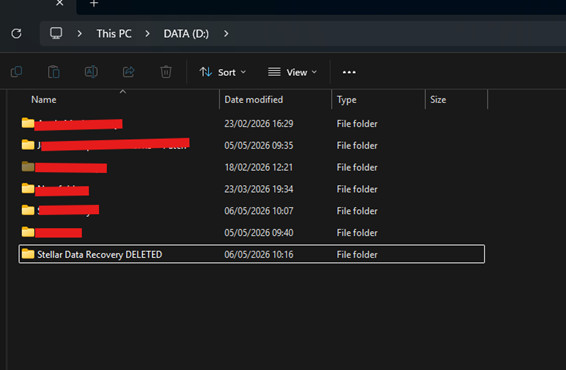
Drive location with test folder
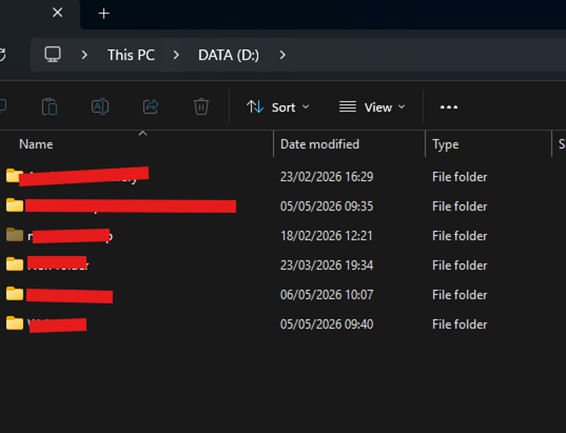
Test folder deleted using CTRL + DEL to bypass recycle bin
Step 2: Choose what to recover
Stellar opens with a simple “What to Recover” screen. For a mixed folder, Recover Everything is the easiest option. If you only need photos, videos, documents, or audio, you can narrow the scan to reduce clutter in the results.
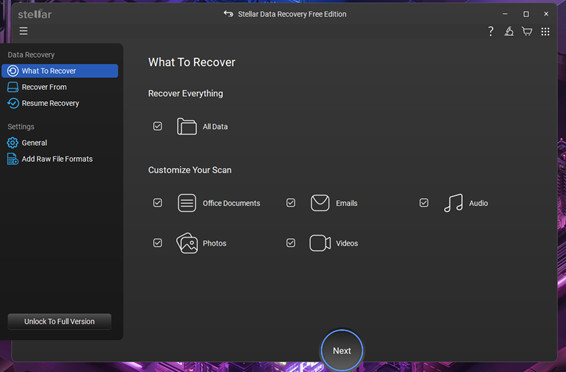
First Step: What to recover, all options left blank
Step 3: Choose where to scan
The next screen asks where the deleted data was last located. In this test, the affected data drive was selected. For external storage, this is where a USB stick, SD card, or portable hard drive would appear.
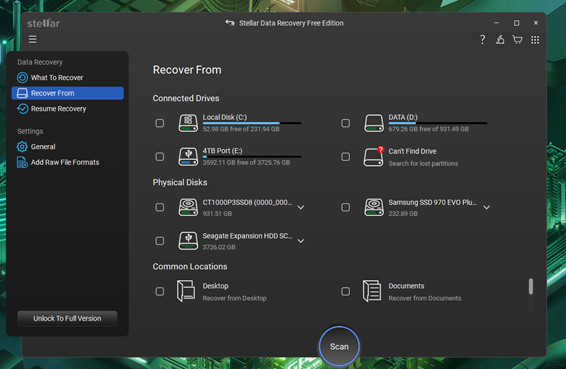
Where to scan screen.
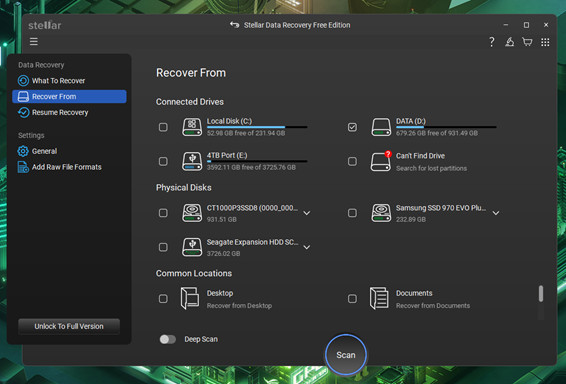
Specific drive selected.
Step 4: Run the scan and review results
After scanning, Stellar reported recoverable data and displayed the file tree. This is useful because you can browse the result before recovering anything. The deleted folder appeared in the scan results and could be selected for recovery.
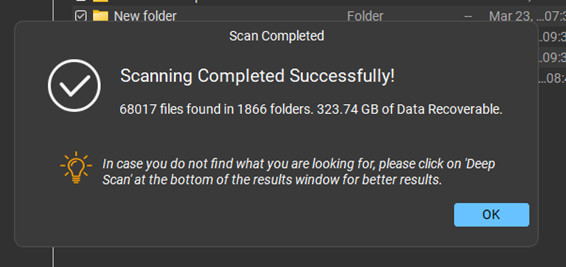
Scan result
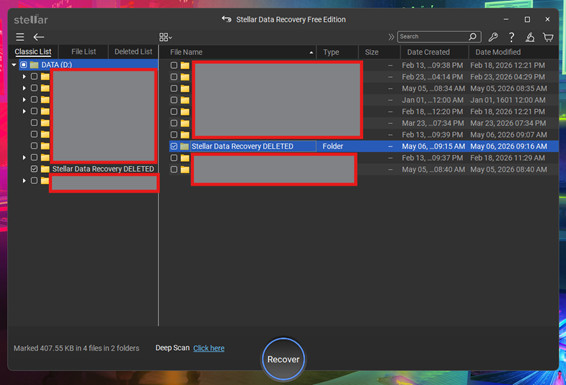
select the items you need to recover
Step 5: Notice the 1GB Free Edition allowance
During the process, Stellar clearly displayed that the Free Edition will recover 1GB of data. This is a helpful, practical limit for smaller emergencies and is one of the main reasons the free edition is worth trying first.
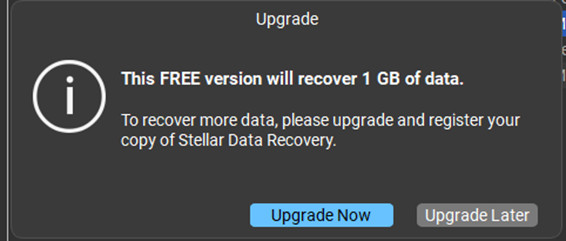
Advising the user that they can recover a massive 1GB of data with their FREE Tier.
Step 6: Save recovered files to a safe destination
The recovery screen prompts for a destination. In the test, a separate recovered folder was chosen. This is exactly what you want to do in a real case: save recovered files somewhere other than the drive being scanned.
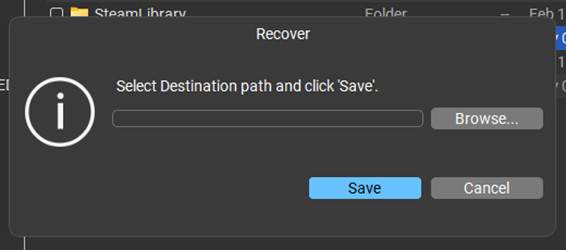
Select the location to restore the items, this cannot be on the same drive.
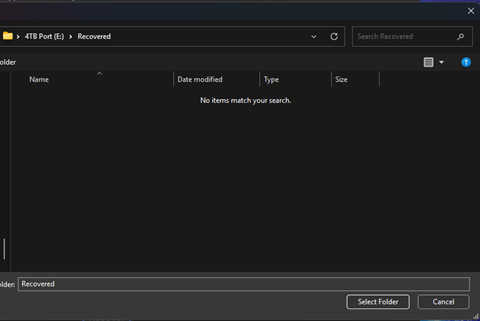
Pick location and press Select Folder
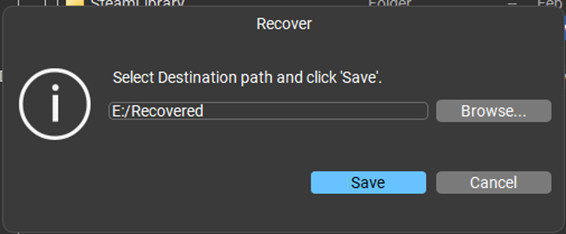
Click Save
Step 7: Confirm the recovered data
The software confirmed that the selected data had been recovered successfully. The recovered folder was then visible in Windows Explorer, which is the real test that matters.
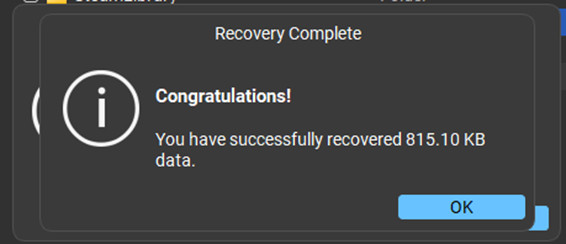
Confirmation of successful restore
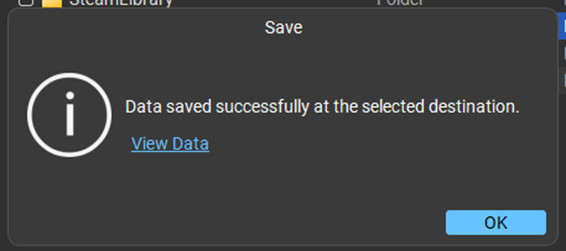
View data link

Items in File Explorer after recovery.
Step 8: Optional settings and file type filters
Stellar also includes options for saving scan information, changing general settings, and filtering recovery by file type. These are useful when you are dealing with a large drive or focus on specific file formats.
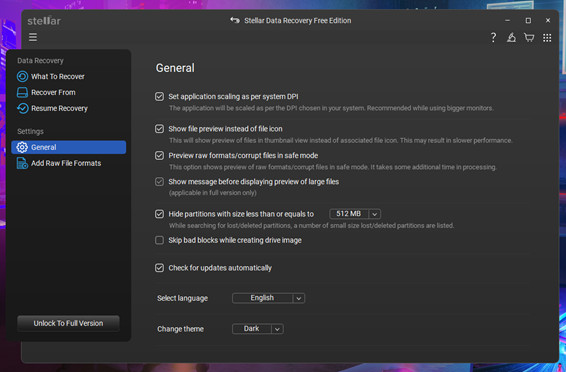
Stellar Data Recovery – General Settings
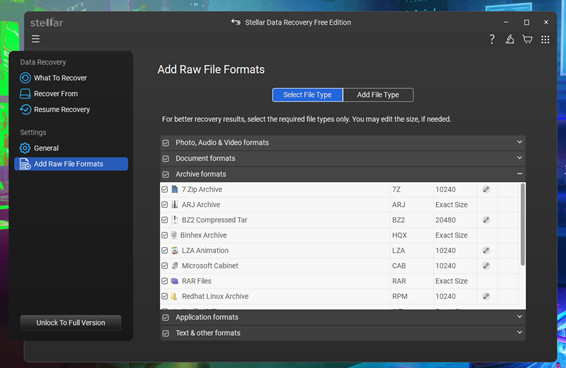
Stellar Data Recovery File type filtering
What the Test Shows
The test shows three things that matter in the real world. First, the process is simple enough for a non-technical user. You do not need to know partition tables, sectors, or file signatures just to attempt a basic recovery. Second, the preview and folder tree make the recovery feel less like guesswork. You can see whether the software has found the folder before committing to the save step. Third, the 1GB free recovery limit is not just a marketing line. It appears during the workflow and gives the Free Edition a practical use case.
For small data loss incidents, that 1GB allowance could be enough. For example, many Word documents are under a few megabytes. PDF invoices and scanned forms can also be small. Even a modest photo selection may sit comfortably below 1GB, depending on image size. Where you will hit the limit is with large video files, big RAW photo shoots, virtual machine images, or entire drive recoveries. In those cases, the free scan and preview are still useful because they tell you whether your files are visible before you decide what to do next.
It is worth being realistic, though. No software can guarantee recovery in every situation. If the data has already been overwritten, recovery becomes difficult or impossible. SSDs can also be trickier because of TRIM, which can clear deleted data more aggressively. That is why speed matters. The earlier you stop using the drive and start a careful recovery attempt, the better your chances usually are.
Common Mistakes That Make Deleted Files Harder to Recover
The biggest mistake is continuing to use the same computer as normal. Browsing the web, installing apps, editing files, downloading videos, and even letting Windows run updates can all create new data. If that new data lands where your deleted file used to be, your recovery odds drop sharply.
Another mistake is saving recovered files back to the original drive. This can overwrite other recoverable items before you have finished. Always use a separate destination if you can, such as another internal drive, an external disk, or a different USB stick with enough free space.
People also tend to run too many tools in a panic. Trying several recovery programs one after another is not always harmful if they are only reading the drive, but installing them onto the affected storage absolutely can be. Pick a reputable tool, install it safely, scan carefully, and avoid making unnecessary changes to the drive until you have recovered what you need.
When You Should Not Use DIY Recovery Software
DIY recovery software is not the right first step for every situation. If the drive is making clicking, grinding, or beeping noises, stop using it. If the drive is not detected by the computer at all, repeatedly reconnecting it can make the damage worse. If the missing data is extremely valuable, legally sensitive, or business-critical, a professional recovery lab may be the safer choice.
The same applies after physical damage, water exposure, smoke damage, or a dropped external drive. Software is designed for logical data loss, such as deletion, formatting, corruption, or missing partitions where the hardware is still functioning. It cannot fix a physically failing disk. In those cases, the smartest move is to power down, disconnect the device, and get specialist advice before doing anything else.
How to Reduce the Risk Next Time
Once you recover the missing file, take a few minutes to make the next accident less stressful. Use a simple 3-2-1 backup approach: keep three copies of important data, on two different types of storage, with one copy off-site or in the cloud. For most home and small business users, that can be as simple as a local external drive plus cloud backup.
Turn on version history where available. OneDrive, Google Drive, Dropbox, and many backup tools can preserve earlier versions of documents, which is incredibly useful when a file is overwritten rather than deleted. For photos and video projects, copy camera cards to at least two locations before formatting them. For business documents, avoid storing everything in one local folder with no backup. It is boring advice, but it is the kind of boring that saves your backside later.
It is also worth keeping a trusted recovery tool bookmarked before you need it. When something goes wrong, you are less likely to grab the first random download from a search result. Having a known option ready means you can act calmly and avoid making the situation worse.
Final Thoughts
Accidentally deleting important files feels dramatic in the moment, but the first response should be boring and controlled: stop using the affected drive, check the obvious recovery locations, avoid writing new data, and only then run a careful scan. That calm first response can make the difference between a simple recovery and a permanently lost file.
Stellar Data Recovery Free Edition fits well into that first-response workflow because it gives users a clear scan, preview, and recover process without needing technical knowledge. The 1GB free recovery allowance is the main USP and should not be overlooked. It makes the software genuinely useful for smaller accidents, not just a demo that stops at the important bit.
For deleted documents, photos, PDFs, and small folders, that free allowance may be all you need. For larger cases, the scan and preview still help you understand what can be recovered before you take the next step. Either way, the golden rule stays the same: the sooner you stop using the affected drive, the better your chances of getting your files back.